Last week we launched our Virtual Facilitation Guide for Facilitator Cards. To help us all transition to this new world of virtual facilitation, we’ll be publishing activities new stacks of cards there every week. Here, we’ll be writing up agendas you can use to facilitate each stack.
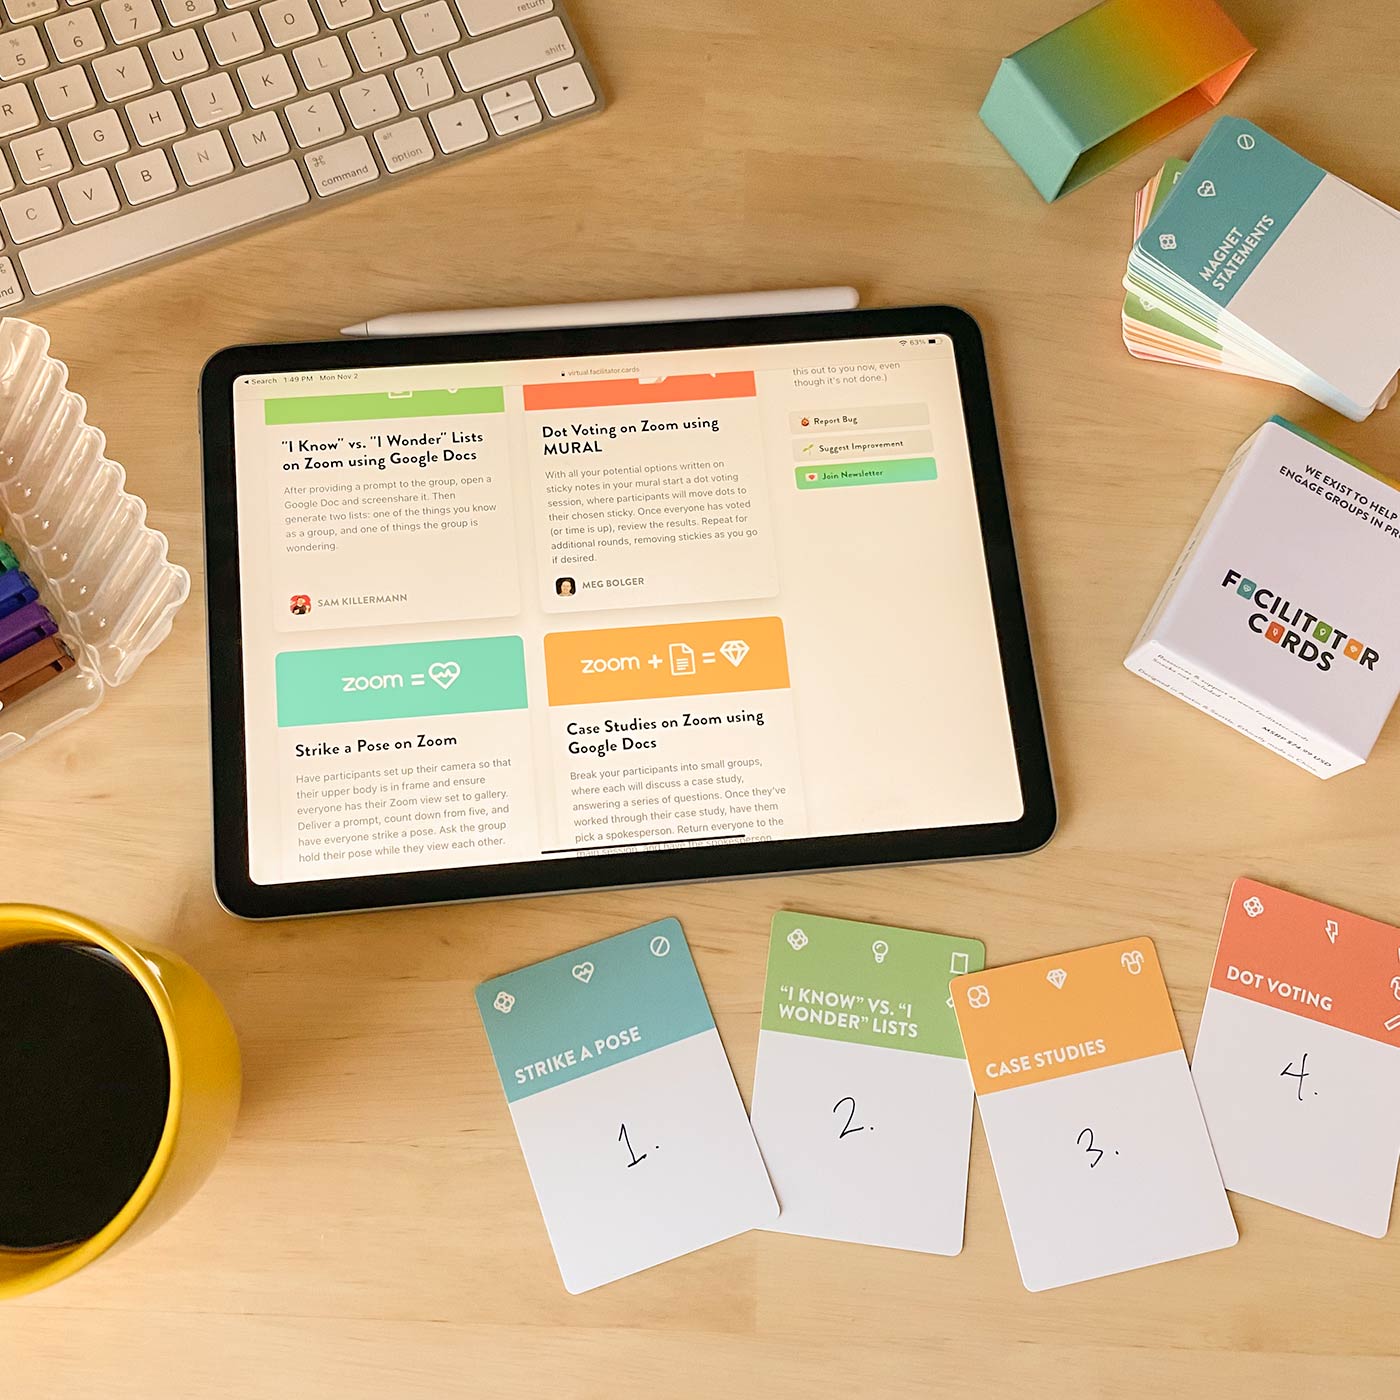
Today, the agenda will provide you what you need to facilitate a virtual workshop where your participants start by Striking a Pose, then collaboratively draft up some “I Know” vs. “I Wonder” lists, before clarifying your focus with Case Studies, and finally collectively making a decision by digitally Dot Voting.
If that sounds like an experience you’d want to give your group, read on. And if you dig this idea broadly and would like to get these guides in your inbox, sign up to get our blog via email.
A Tiny Primer on These Virtual Agendas
In the coming weeks, I’ll be writing a bunch of these guides for virtually facilitating stacks of Facilitator Cards on Zoom. There are two distinct ways I hope you’ll find them useful that will apply universally to every guide.
One, You can take this agenda literally and run it exactly as it it’s written. I’ll be writing these up with enough detail for you to take it and facilitate it as-is. No need to sub things in or out. Just get a group together and run them through this sequence and know you’ll all have an engaging, meaningful meeting together. Let’s call that the prix fixe offering.
Alternatively, you can take portion of this and combine them into your own agenda. Grab an activity or two from this sequence, or maybe a transition or instruction you find helpful, and use them to put together a workshop that is altogether dissimilar from what’s here. I’d call that the à la carte approach.
Every stack will take your group through the full Facilitator Cards flow (from emotion to ideation to clarification to execution). But you might only need one, two, or three of these outcomes.

Feel free to chop the appetizer. Or start with dessert.
Whether you’re facilitating prix fixe or á la carte, I’d love to hear how this goes. This is a big component of our Virtual Guide: we want to learn from one another! Reply back via email, or using one of the buttons on the individual activities to “contribute a reply.”
We also invite you to submit your own virtual Facilitator Cards activities to be published in the guide, if that sparks your fancy.
Get Prepared
To facilitate the stack of Strike a Pose into “I Know” vs. “I Wonder” lists into Case Studies ending with Dot Voting, here’s what you’ll need to get:
- First, read the individual write-ups for each of these activities on the Virtual Guide (I linked each in the paragraph above).
- Get comfy with the basics of Google Docs and MURAL (and make sure you have an account for each).
- Create the Google Docs templates for your “I Know”/“I Wonder” lists and case studies.
- Get a blank Mural set up dots equaling to the total votes you’re going to allow participants to cast.
- Have an end goal decision to make in mind. This will be what you’re working toward throughout the sequence, and each individual activity should nudge you closer to that.
I’ll explain each of these in more depth below, but this checklist can help you prep before a workshop each time you facilitate this sequence.
1. Strike a Pose on Zoom
The first activity of the sequence is perfect for getting a sense of where everyone in your virtual room is standing – figuratively and, because of the fun nature of this process, literally. The overall arc of this sequence is aiming toward making a final decision with group input, so we’ll start by figuring out what’s on your participants’ minds.
In the Strike a Pose on Zoom write-up by Meg, you’ll read that the gist of this activity is to give your participants a prompt, then have them respond non-verbally by posing with their bodies on-camera.
It gets people moving, surfaces emotions in an unconventional way, and generally just mixes things up. It’s fun.
For this sequence, we’re going to have our participants strike multiple poses. And we’re going to wait to debrief until after we’re done with all of them.
Start by giving the instructions as laid out in the activity (for people to set up their space, get ready for the prompt, check in for questions). For your prompts, I recommend three that resemble these:
- “Our focus today is ______ [But don’t say the blank, obviously. Say a short version of whatever your end goal is. This isn’t Fill in the Blank]. Strike a pose that represents what you’re most excited about ______.
- [Wait 10-15 seconds. Encourage people to look at other people’s poses] Okay, now strike a pose that represents what you’re most concerned about ______.
- [Wait, then…] Finally, strike a pose that represents what you’re most curious about ______.
To debrief, ask participants if they noticed any particular poses they’d like to hear explained from the “excited,” then “concerned,” then “curious about” prompts. Try to hear from at least one or two participants from each.
Transition into the next activity with something like the following segue:
“Now we’re going to really hone in on those things we’re all curious about, in contrast to the things we know. To do that, we’ll be generating I Know versus I Wonder lists.”
2. “I Know” vs. “I Wonder” Lists
Share your screen and open up your “I Know” vs. “I Wonder” Google Doc. Explain that in the left column, the group will be listing things they know about ______. In the right column, things they don’t know, but wonder, or are curious about.
It might be helpful to pull in a few of the shares from the “curious about” poses in the previous activity, and fill those in to give people a clear example.
Check in on the instructions, as always, then start. Having participants either raise their hands or share aloud (depending on your group size and general group norms) items, one at a time, waiting for them to be scribed before the next one.
With every share, double-check, “Is this a Know or a Wonder?” And after the person who shared it answers, double-check with everyone else, “We all good with that?”
If anyone contests a “Know,” there’s a good chance it’s a “Wonder.” This list is things you all, as a group, collectively know about whatever your focus is for the workshop.
After you’ve filled the columns or exhausted the shares, transition with the following segue:
“Now we’re going to be breaking into small groups to tackle a few of the more poignant shares you all are wondering about.”
3. Case Studies on Zoom Using Google Docs
Again, not to be repetitive, but remember what your overall goal is with this sequence. We’re going to be moving into Dot Voting next, and the last thing we need before voting on options is clarification for everyone about what those options are (or what the important facts are undergirding your possible decisions).
There are two routes you can take here for Case Studies using Google Docs. I’d recommend you prepare for both.
The common ground for both is that beforehand you’ll want to create the Google Doc with page breaks for each case. Title the pages whatever you’re calling your breakout rooms (A, B, C, etc. works; 1, 2, 3, etc. works; as does breaking up groups by roles or other traits – just make it clear). And have discussion questions prepped below the case to help the group work through it.
Now let’s talk about the two different ways you might do the cases.
One option, and I’d say this is most ideal in most circumstances, it would be absolutely magical if a few of the “I Wonder” shares presented themselves nicely as a potential case study. Read what makes a good case study in the context section, and keep your eyes peeled for anything shared earlier that would be great for small groups to work together to clarify. On your template, you’ll just want to have generic questions down below, and a space up top to copy-paste the case study focus from the previous document.
Alternatively, you can draft up case studies beforehand, the way you normally would. Shape them to fit nicely into this sequence, and give the small groups the ability to dig into important concepts or topics that will help the full group make decisions when you vote.
It’s nice to have a Google Doc ready for both cases, because you don’t want to be caught without anything wonder-ful and be grasping. But if you’re more of a “control equals comfort” facilitator, then it’s totally okay to just to the prepared case studies and not bring anything in from the previous discussions.
No matter what, participants will naturally bring things in from the previous discussions, because that’s what we do. It’s why facilitation is so great! But I don’t need to tell you that.
After you’ve dispersed your groups, given them enough time to work through their cases, and had them come back to the main group to present their findings, it’s Dot Voting time. Here’s a clever way you might segue into that:
“It’s Dot Voting time!”
4. Dot Voting on Zoom using MURAL
Like with Case Studies, there are two routes you might take with Dot Voting on MURAL.
If you knew before the workshop that your group would be choosing between a few pre-determined options, have those already populated on stickies and use them as your candidates for voting. Easy-peasy. This entire sequence works really well for preparing people to decide between rigid, these-are-our-only-options type options.
However, if the goal in mind is more amorphous, and part of the point of the workshop is to figure out what next steps should be, or even might be, then this is a perfect time to accept nominations for consideration. Based on the previous on the Case Studies, and in particular the more compelling cases, or the ones that struck a chord with your group, ask for participants to suggest a course of action, or a candidate for your decision-making, given your overarching goal of [whatever the point of your workshop is].
You can have participants create sticky notes with their options, or you can ask them to share them aloud and create the stickies yourself. Set limits in ways that make sense for your goals (e.g., “one suggestion per person”, or “we’re only going to take the first five suggestions”). After the voting candidates are ready, give your instructions for voting, per the Dot Voting step-by-step.
If there’s a tie, you can issue more dots and have people vote again to break it. Or you can go retreat back into a new clarification process to try to get to better understand each of the potential options, before coming back and voting again on just those two (or three, or however many) options.
Your call. You got this.
Questions? Comments? Concerns?
This is our first virtual stack, and the first stack we’re publishing here at all.
I’d love to hear what you think about it, and how I can make it more useful for you! We’ll be adding a new stack of activities to the Virtual Guide every week, so any feedback you provide will help us make each of these agendas more useful in the future.
You can contribute replies to the individual activities. We’d particularly love to hear if you’ve tested the activities or tweaked them. Just scroll to the bottom of the activity on the Virtual Guide and click that “Contribute a Reply” button.
And generally speaking, emailing us with whatever is on your mind is always welcome. We’re easy to find, and we’re all ears. Constructive criticism is our lifeblood, so we appreciate your generosity if you’re willing to share.
Facebook Discussion 💬 Join our Group 🤓